Showing posts with label cupcakes. Show all posts

Wednesday, March 19, 2014

It's a Mad World...


“Have I gone mad? I'm afraid so, but let me tell you something, the best people usually are.”
~Lewis Carroll - Alice in Wonderland

If you have ever read Alice in Wonderland (the book, not the movie) then you are aware of the extremely brilliant chaos around the Mad Hatter's tea party. There is something to be said about his quotes and how mad they truly are.

I recently had the pleasure to work with a team on a project of madness to help produce a "pinterest worthy" baby shower for my wonderful sweet niece. My task was to create the menu and cook it while my Sis-in-Love (Sue) was asked to do all of the items required by pinterest my niece to create a magical scene from the ceiling to the floor. As you can see in the pictures below, it came out pretty cool and it was certainly not a job for one person to tackle.

My first task was to create a menu of small bites for a tea party, but making them hearty enough for the men that would be attending since it was a coed shower. Keeping within the "mad" theme, I added bacon to several items and put some whimsy into others. All in all, I think we covered the first task.

My second task was to create cupcake toppers out of fondant to mimic the Alice in Wonderland characters. I first went online to try to purchase them.  The price was way too steep for my budget and after all, I thought to myself, it is part of my job as a recipe developer and food stylist to know how to make and do these things. So off I went to YouTube to research fondant and Alice characters. I settled on easy enough shapes that I could cut and paste together on round white disks of marshmallow fondant. What I did not figure in was the time it would take to make 30 of these toppers. After one day on my own, I asked my friend Lisa and my Mom to come over and help and I'm so thankful for that help as it allowed each of us to add our own artistic touch and style on each one that we made.

It was nice to have the fondant toppers made, dried and packed to take on the plane, but my job was easy compared to the countless hours Sue put in. From 9am Friday morning when she picked my daughter and I up at the airport until Sunday at 6pm, she did not sleep once. As an ER nurse, she may be used to those hours, but even if that's the case, I was still blown away by her energy. She led our collective team down a rabbit hole of crafts and turns and stores and ideas that only a Mad Hatter could dream up. So with the help of brothers, sisters, nieces, great nieces, nephews, future grandparents, daughters, and a handful of good friends, this party's atmosphere was formed and created within 48 hours. I often wonder how those people on pinterest create the functions that they do. Or how they pull off those amazing event themes they post. I am here to tell you that there is no way they do it by themselves.  I can honestly tell you it takes a Mad Mad team to pull off a Mad Hatter Tea Party without having to hear "Off with her Head"... I'm jus sayin!

The Main Dining room for the Tea!


The Amazing Centerpieces (such attention to detail & everything handmade)
Of course, no baby shower these days is complete without a "diaper cake". How clever is this topsy turvy cake made collectively by Mackenzie, Melissa & Kevin (I especially like the tea pouring half-hazzardly out of the pot into the cup.
Did I mention that every tea pot and tea cup and paper item was hand made and folded using a cricut?
We had guest participation too. How creative are you at painting a saying on a onesie?
Speaking of creative - my brother custom designed this croquet set. Now you know what I mean when I say my daughter got her artistic genes from him. This is so cool and the kids (and adults) had a great time playing. 
Yes my beautiful daughter stayed up to 3am designing and painting this photo booth. (I personally think she has her Uncle's artistic genes)

There was a sugar sweet candy bar that Sue's friend Delaney put together. As you can see, this is not her first time putting one of these objects of confections together. She has a great eye for detail.

One thing my niece had insisted on was pom poms and she wanted them hanging everywhere. Pom poms she made and they were beautiful hanging from the ceiling in her signature colors.
Behind the scenes making of the diaper cake. That's my sweet niece Melissa and she spent alot of time on finishing that cake.
This is my sweet little MackaRone (aka Mackenzie, aka soon-to-be big sister). I let her place all of the fondant toppers on the cupcakes. She has so much attention to detail with tasks that are given to her. Do I see Chef in her future????
Time to eat!
The buffet table almost filled
Bacon Wrapped Pretzel Rods.
Preheat oven to 350'
Line a cookie sheet with foil and then parchment paper.
Wrap one slice of bacon around a pretzel rod. Place in a row with as many as you prefer on a cookie sheet so that they are not touching. Sprinkle lightly with brown sugar and chili powder. Bake 20 minutes or until the bacon is cooked. Remove to a plate to dry. Rods will be soft and wiggly at first due to the heat and bacon drippings. When they cool the will become hard again to place in an upright vase to serve. ~Hint~ Make extras as they go fast.

Meatball Cupcakes
Preheat oven to 350'
Use foil/parchment lined cupcake liners.
Make your favorite meatloaf recipe. Using an ice cream scooper, scoop one ball into each liner in a muffin pan. Make a mixture of ketchup, brown sugar, and chili powder. Spoon a tablespoon on top of each meatball. Bake for 25 minutes in oven. Remove and when cool to touch, pick up each muffin and try to drain some of the fat out. This can be a little tedious but less fat means less splatters on the eaters. Make your favorite mashed potato recipe. Pipe it on the top of the meatball (frosting) and sprinkle with bacon bits (and shredded cheese if you prefer). Top with a cherry tomato if you like.  Refrigerate until serving where you can warm them in the oven at 200' for 15 min.

I had leftover mashed potatoes so I piped small rosettes on a parchment-lined cookie sheet and sprinkled with cheese and paprika. Baked until set, about 15 minutes in a 350' oven. They went fast with all those helpers.
A quick recipe I found here - I substituted large slices of pepperoni with these cute little minis. I doubled the batch as well.
My sweet niece and nephew - Can't wait to welcome baby Jayden!
Are you ready for Dessert?
We had red velvet and chocolate cupcakes. Topped with brilliant colored buttercream. And each had a topper on them and my signature "orange" pansy. We also purchased plenty of delicious tea cookies and I made a dozen chocolate dipped strawberries as a last minute request.

I used this recipe for the marshmallow fondant and this tutorial for help.

My Sister in Love Suzie


Sunday, June 24, 2012

The Sweet Taste of Volunteering


Before our youngest child started middle school, my husband and I agreed that it would be a good idea for me to stay home, so long as finances allowed for it.  After all middle school is not for the weak and never has been.  As part of this plan, I volunteered to work in the school office every Tuesday.  What started out as a plan to keep up with my daughter turned out to be so much more. For the last 3 years I have used the staff as my guinea pigs - ahem, I mean testers - for many of the recipes for my blog.  They did not seem to mind being forced each Tuesday to have a sweet treat. Unfortunately, getting honest feedback from them was tougher than nails as they were never critical - I think they were afraid if they gave honest feedback I might stop bringing treats.  Anyway, I digress.  Most of the days I had planned out what I would bring because it was something that had been floating in my head all week.  But then there were those days where I was really busy and completely blocked for creativity.  Those were the days that I had to open up the fridge to see what I had and use my inner "Chopped" skills. Funny how I feel those tend to be my best desserts.  It's like I'm being creative and don't realize it until the finished result.  Now, three years later, our daughter is ready to move on to high school.  It has been an honor and privilege to work in the office with some of the finest ladies I know.  I will miss them dearly and I am proud to say that buttering (or sugaring) up the staff just in case my daughter got in trouble was not needed.  She made it through with a strong shell and, thanks to some of her amazing teachers, a solid focus for the future... I'm jus' sayin'!


One Pot (food processor) Cheese Tart

Preheat oven to 350º

In my food processor I combined the following for the crust.

9 bakery style (non-frosted) sugar cookies
2 Tbs. melted butter

Blend until combined
Pat into an 8 inch tart pan, all the way around and up the sides.
If you use a bigger tart pan just use more cookies and a tad more melted butter.
Don't wash the processor bowl out, just free it from any excess crumbs you may have lingering on the sides.

Place the following in the food processor .

1 8 oz. Brick of Cream Cheese (Room Temperature)
1 Egg
1/2 Cup of Sugar
1 Tbsp. of Vanilla

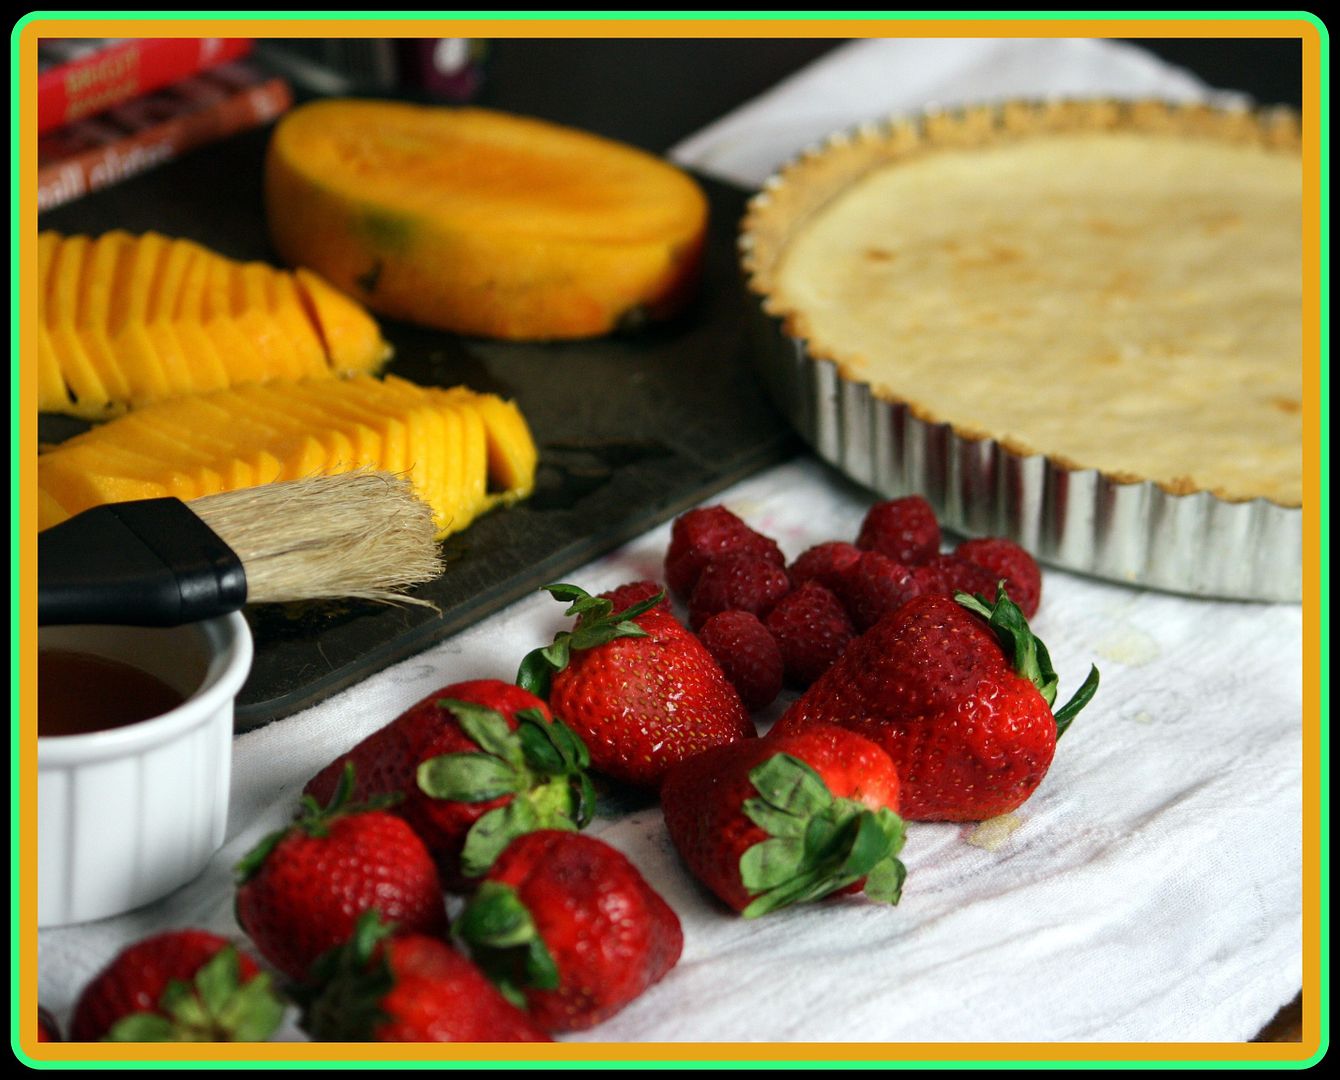
Whirl until creamy. Spread evenly over crust. Place tart pan on a cookie sheet. Bake in oven for approximately 25-30 minutes. It will be done when it only has a slight movement to the middle but the sides are firm.  Cool completely before topping with your favorite sliced fruit. I used mangos and strawberries as they came in my co-op produce basket this week. I also melted a little peach jam and brushed it on top of the fruit to give it a little glisten. This is also a good tip if your fruit is not very ripe or sweet. However, I feel perfectly ripe fruit is the way to go on this tart.

I would love to see what your favorite fruit combos are - keep me posted.


Many cupcake flavors were taste-tested over 3 years.


I will miss Tuesday afternoons - These ladies made volunteering so fun. 


Wednesday, December 1, 2010

Texas Sheet Cupcakes!


About eight years ago I found myself at my first Texas church potluck. It was there that I was first introduced to the "Texas sheet cake". Funny that in all my years of baking and having my Daddy share all of his Southern recipes with me, this one somehow passed on by me. I first started noticing this odd looking sheet cake at church potlucks. Then when we'd go to friends' houses for parties I'd see it there too. I never saw it in the bakeries and quite honestly, it never looked that appealing to me. Then one Sunday, as I was last in line at a church picnic and the peach cobbler was all gone (and I just don't care for bananna pudding), someone handed me a slice of this Texas sheet cake. It was then that I found pure joy in this little slice of heaven (and not because I was standing on Holy ground - well, maybe). My fork went deep into this fudge-like consistency before hitting this dense, moist, chocolate and almost brownie-like cake with a subtle hint of cinnamon. Wow! Who Knew? It was then and there that I felt somehow deprived of a Texas specialty. It was also in that moment that I decided to learn more about the "Texas Sheet Cake". Some say it got its name from being as "big" as Texas because it's made in either a 13"x9" or sheet cake sized pan. Or that Lady Bird Johnson brought it with her to the White House. Some say it's so sweet that you only need one little piece to satisfy the sweet tooth, which means one cake is enough to feed a crowd, and Texans are always feeding crowds. Which brings me to my theory. I think - and I will quote from "Steel Magnolias" - it's because "it freezes beautifully" as well as transports easily, whether it's to a church potluck, a graduation, a funeral or a family reunion.

So not too long ago, I got a request to make this recipe. My friend Meaghan's family celebrates her Mother's birthday on Thanksgiving every year. She wanted to surprise her Mother this year with her favorite cakes. Earlier in the month, she secretly got her Grandmother's Texas Sheet Cake recipe from her Mom (as well as her recipe for German Chocolate Cake, as I was asked to make that too). Normally on a recipe so tried and true, I will not change anything - I mean, why mess with perfection, right? Besides, this was all about Meaghan's Grandma so I needed it to be baked from the heart. That said, I couldn't help but to try and put a new spin on it (insert sheepish grin here). I thought, why not cupcakes? Everyone loves cupcakes and I knew this cake would be sharing a dessert table with many traditional Thanksgiving desserts. My twist on this traditional cake turned out as I had hoped and was enjoyed by all.

Here's a list of things you need to know if you want to make these delicious cupcakes.
1) Make sure you only fill the cupcake liners 3/4 full of batter. You'll need to use the top of the liner as a lip to keep the warm molten icing in place as it sets up.

2) I do not suggest using Texas-sized cupcake liners. I put the same amount of batter in each one but they baked inconsistently - some were higher and fuller and some sunk down when the icing was poured on.

3) It's important to make your icing as soon as you put those cupcakes in the oven since the icing needs to be finished and cooled a bit to spoon on the cakes as soon as they are out of that warm oven.

4) Last but not least - don't feel the least bit embarrassed over the final product if they look a little off. After all, this is just one of those recipes that every Texan knows tastes better then they look. I'm jus' sayin'!


Texas Sheet Cake
(Recipe from Meaghan's Grandmother)
Archived from Cooking Light

Ingredients
Cake:
Cooking spray
2 teaspoons all-purpose flour
2 cups all-purpose flour
2 cups granulated sugar
1 teaspoon baking soda
1 teaspoon ground cinnamon
1/4 teaspoon salt
3/4 cup water
1/2 cup butter or stick margarine
1/4 cup unsweetened cocoa
1/2 cup low-fat buttermilk
1 teaspoon vanilla extract
2 large eggs

Icing:
6 tablespoons butter or stick margarine
1/3 cup fat-free milk
1/4 cup unsweetened cocoa
3 cups powdered sugar
1/4 cup chopped pecans, toasted
2 teaspoons vanilla extract

Preparation
Preheat oven to 375°.

To prepare the cake, coat a 15x10-inch jelly-roll pan with cooking spray and dust with 2 teaspoons flour. Set prepared pan aside.

Lightly spoon flour into dry measuring cups; level with a knife. Combine 2 cups flour and next 4 ingredients (2 cups flour through salt) in a large bowl; stir well with a whisk. Combine water, 1/2 cup butter, and 1/4 cup cocoa in a small saucepan; bring to a boil, stirring frequently. Remove from heat; pour into flour mixture. Beat at medium speed of a mixer until well-blended. Add buttermilk, 1 teaspoon vanilla, and eggs; beat well. Pour batter into prepared pan; bake at 375° for 17 minutes or until a wooden pick inserted in center comes out clean. Place on a wire rack.

To prepare the icing, combine 6 tablespoons butter, milk, and 1/4 cup cocoa in a medium saucepan; bring to a boil, stirring constantly. Remove from heat, and gradually stir in powdered sugar, pecans, and 2 teaspoons vanilla. Spread over hot cake. Cool completely on wire rack.

Note: You can also make this recipe in a 13x9-inch baking pan. Bake at 375º for 22 minutes.

Cupcake Variation
Line cupcake pan with 24 cupcake liners - fill 3/4 full of batter. Bake 15-18 minutes (depending on your oven). When you touch the top and it springs back it will be done. Pull cakes out and spoon 1-2 Tbs. of warm icing on each cake. No worries if some sink down. I also garnished mine with a dollop of regular chocolate butter cream icing (I know it's a bit over the top but what can I say - it's a sugar thing! I also purchased a cute little State of Texas chocolate mold to garnish each cake with. You can get that here. Oh and because I was trying to "mask" some of the cupcake's inconsistancies, I put a few white chocolate curls on top by just using my potato peeler over a cube of white almond bark.

Meghan's Grandmother's Down Home German Chocolate Cake
(Archived from the original Bakers German Chocolate bar)

Friday, November 20, 2009

Burnt Almond Cupcakes!

It doesn't matter if you have lived in the same place your whole life or if you've moved often and lived all over like the proverbial "army brat". We pick up special taste memories along the way. I am most certain that if you think about your favorite dish, your mind will go back to that first time you had it and how good it tasted in your mouth. I bet your thinking about it right now! It happened to me the other day and brought back a favorite memory. For no apparent reason I started thinking about a little bakery in the town I grew up in. Dick's Bakery was that cute little corner neighborhood bakery that you went to for coffee and donuts and one other thing - Burnt Almond Cake. We ordered it for birthday's, showers, and even weddings. It was that one delicious cake that you could always count on to never change. I even heard that Dick's is still there and still baking that wonderful cake. Many years ago, I took one of my first baking classes on "fancy cakes" and as luck would have it, the instructor used to work at Dick's. She showed us how to make those incredible caramelized almonds that mounded the pastry cream on top of that lovely white cake. Using that memory as inspiration, I thought I would create my own little cupcake version or that wonderful dessert. What a hit! It tasted just like Dick's and brought me right back to cakes I had as a child - minus the pink box and string. The beauty of this cupcake is that not only do I get to have that delicious taste (to curb my craving) but I also get to pass them along to my friends rather than my thighs! I'm jus' sayin'!

Burnt Almond Cupcakes

Prepare Almonds:
In a large cast iron skillet toast 1 8oz package of sliced (not slivered) almonds. (I used http://www.bluediamond.com/index.cfm?navid=61)
Then sprinkle 1 Cup powdered sugar over almonds.
Stir constantly as not to burn the almonds.
Once the sugar is melted, add another 1/2 C. of powdered sugar to the almonds.
Your almonds should be brown in color and the aroma should be sweet toasted nuts.
Take off the heat and then spread on a cookie sheet lined with parchment paper to cool.

Cupcakes:
You may use your favorite white cake recipe here and add almond extract to the batter or you could even add almond extract to a box white cake mix (I think this recipe is all about the almonds and icing so as long as it's good cake you should be good) If you don't have one feel free to use mine.

White cake recipe.
* 1 cup white sugar
* 1/2 cup butter
* 2 eggs
* 1 teaspoon vanilla extract
* 1 teaspoon almond extract
* 1 1/2 cups all-purpose flour
* 1 3/4 teaspoons baking powder
* 1/2 cup milk

1. Preheat oven to 350 degrees F (175 degrees C). Grease and flour a 9x9 inch pan or line a muffin pan with paper liners.

2. In a medium bowl, cream together the sugar and butter. Beat in the eggs, one at a time, then stir in the vanilla. Combine flour and baking powder, add to the creamed mixture and mix well. Finally stir in the milk until batter is smooth. Pour or spoon batter into the prepared pan.

3. Bake for 30 to 40 minutes in the preheated oven. For cupcakes, bake 20 to 25 minutes. Cake is done when it springs back to the touch.

Yummy Frosting:
In a mixer blend the following in this order-remember powder sugar will go every where on high speed so put it in slowly until it is all incorporated and then whip that frosting like mad!
1/2 cup butter (softened)
3 cups of powdered sugar
1/4 cup of vanilla coffee creamer or if you can find an almond flavor coffee creamer use that. (Yes I did say coffee creamer it's my secret ingredient)

Continue to whip until you get your desired consistency, now if it's too thin add more powdered sugar. If it's too thick then add a bit more creamer. Don't be intimidated by this. It's a no-fail icing that gets rave reviews every time.

To Assemble:
Cool cupcakes:
You can spread or be fancy and use a zip lock bag to pipe a large swirl of icing on the top of the cake. Then take your almonds (which after being cooled you should break into little clusters) and mound a good table spoon on top of frosting. If these make it after one day from being devoured I would keep them in the fridge up to 2 days. Doubt that will happen cause these really are yummy! Thanks Dick's http://www.dicksbakery.net/