Monday, January 16, 2017

A Childhood Chocolate Favorite - An Editorial Photo Shoot and Foodstyling Project

When it comes to your own personal history with food, how far back can you remember? Most chefs and passionate home cooks that I know can easily recollect the first dishes they made or the person that taught or inspired them to cook.

I started cooking and baking as soon as I could stand on a chair and reach the stove. One of my very first cakes was an easy recipe that was on the back of a Hershey's Cocoa can. There's a reason why this recipe is 40-plus years old and garners so many five-star ratings on their website's comments section. Using this as inspiration, I recently collaborated with photographer Rachelle Bendixen on an editorial photo project that tells a story about making this simple and delicious rustic cake. As a commercial food stylist, I don't always get the opportunity to share my work here on my blog – it usually goes straight to my business site's portfolio section. With this project, however, the personal connection that I have with this cake lends itself perfectly to my blog as well. I'm excited to share the results of our work here...
I wanted to style this shoot with the simplest props to help tell a story about the history of this cake from my perspective. She gave me full creative reign and captured beautiful images (as well as a soon-to-be-released podcast that she has been laboring over).
My prop choices were rustic old baking tools with a lovely patina and dark, distressed wood. Some of the utensils have actually been in the family for several generations. For the backdrop, Rachelle chose a beautiful piece of steel that she buffed to bring out the swirls of patina. Her lighting was perfect and the mood was dark and rustic.
I brought my son in to be our hand model for this shoot and to me, it just adds to the story telling by adding another generation.


Keeping with the simplistic theme, I went with an easy ganache for both the filling (chilled and whipped) and the topping (warm).


If you are looking for an absolutely easy and decadent cake, I highly recommend this recipe.  Give it a try and let me know how you like it. Do you have a favorite recipe, cake of otherwise, that has stayed in your repertoire since your childhood?


A huge thank you to Rachelle for her open heart on this project. I am so grateful that she was able to capture my vision and the rustic charm and love I have for this cake, not to mention her countless hours in creating and editing the podcast. I would also be remiss if I did not thank my son and occasional assistant for generously stepping in as our model - I adore you and I love that you have the same passion for food as your Mama - may you continue to pursue food with passion and creativity. And also to my husband and partner in life for all of the graphic design and text editing. 


Saturday, February 20, 2016

Upside Down Chocolate Blood Orange Cake


Have you ever had "one of those days" that turns into "one of those seasons"?

If you're a follower of my blog, you might be wondering if I have "checked-out" because I have not posted much lately. The truth is,  I've taken some time off from blogging to concentrate on my business and get a little more focused on my website. As grateful as I am for my business, I also long for those days when I could just throw myself in the kitchen and bake for no other reason than the cathartic essence of non-work-related baking. I absolutely love what I do for a living and after 30-plus years, being able to have that "dream job" is something I pinch myself over every morning when I wake.  I'm not sure what happened, but last week I found myself in need of some serious "zen baking" and as luck or God would have it, a day came up with no appointments, family business, lacrosse games, or anything else to take up my time. So in the kitchen I went.

I love winter citrus, mostly because of my beautiful Meyer lemon tree that continues to be prolific year after year. This year, my blood orange tree came back with a few oranges (we thought it was a goner after freezing a couple of years in a row) and so I wanted to pay homage to the gorgeous red and orange, sunset-colored flesh of this delicious citrus. It's a natural to pair orange with chocolate, so I set out to research chocolate and orange desserts.

Not quite Nigella makes a really good blood orange cake that I've made before, so I adapted her recipe but opted for a dark chocolate cake base. What I love about upside down cakes are that one recipe can make two cakes, since they are not layered, or three smaller cakes (like I did here), so you can give them as gifts.

It makes sense that after being on hiatus for a few months and having a schedule that seems so upside-down that I would come back with this cake, I'm jus' sayin'! 


Upside Down Chocolate Blood Orange Cake

 Ingredients:

Topping:
3 Blood Oranges (sliced thin, ideally on a mandoline)
1 Cup of Water
1/2 Cup of Sugar


Cake:
One recipe of your favorite Chocolate Cake (you can use a box or your favorite from scratch).
My go-to, never fail recipe since forever is this Hershey's recipe.

It's important to line your pans with parchment paper, as the oranges can become quite sticky.

Make your cake batter and set it aside.


Decide on how many cake pans you will need. I went with two 5 1/2 in. and one 7 1/2 in. One batch of cake batter will yield up to two 9 in. pans.

Pre-heat oven to 350˚


In a heavy, large skillet, stir the water and sugar until the sugar is dissolved and bubbles are forming around the outer rim of the skillet.  Carefully place your orange slices in the skillet so that they are all easily covered with the syrup. You may have some overlapping - I used a chopstick to maneuver the slices without breaking them.


Lower the heat and continue to boil until the rinds on the oranges are translucent.  Carefully remove (I used the chopstick) the slices and lay on a parchment lined cookie sheet.


Bring syrup back up to boil and reduce until they are a corn syrup consistency.


Using a pastry brush distribute the thick syrup amongst your pans.
Carefully arrange orange slices overlapping each other to cover the baking pans.


Distribute your chocolate cake batter among your pans. Bake as followed per cake recipes or back of box mix.
I baked my pans for 25 min until a tooth pick came out clean in the middle.
As soon as you pull the cakes out, let rest for 5 min, then invert onto a plate. Carefully peel away the parchment paper to reveal the glazed oranges. Cool completely.


Monday, November 16, 2015

Pumpkin Pie Balls


I'm not sure if it's because I have a job that can at times waste food or if it's the miser in me, but either way, when I'm faced with the option to throw out or re-purpose, I'm always going to go for the latter. I recently made a birthday cake for a friend that required a couple of cake donuts. I'm not sure if I was tired or desperate, but I settled on the only thing I could find in the store at that moment - a "value pack" sized container of old-fashioned glazed cake donuts. After making the cake, I ended up with ten leftover donuts. My family loves a donut once in a while, but getting rid of ten was a little harder than you would think. When it came time to decide if I wanted to throw them out or re-purpose, it wasn't hard to decide.

I had a half a can of pumpkin in the fridge and since this is the pumpkin pie season, I decided to create a little cake ball pie ball out of my extra donuts. I was surprised that when the dough was all mixed together, the consistency came out just like pumpkin pie filling. These pie balls are pretty sweet with the candy shell, but the shell holds the filling together. I think another option would be to roll the chilled balls in graham cracker crumbs and freeze if you wanted to do a frozen pie ball. Give it a try and tell me what you think.

Pumpkin Pie Holes

What you will need:

1 Dozen Old-Fashioned Glazed Donuts
1/2 Can Pumpkin Puree
2 Tsp. Pumpkin Pie Spice
4 Tbs. Melted Butter
1/3 C. Cream Cheese (softened)
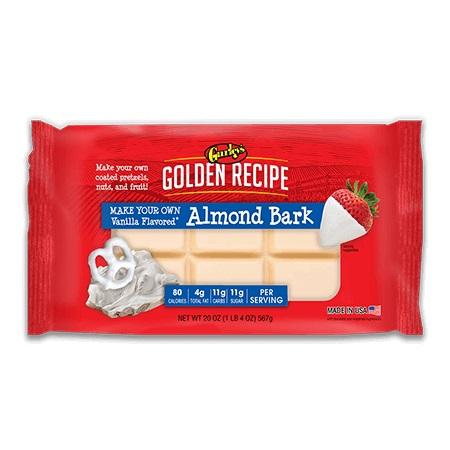
1 Pkg. of White Coating Almond Bark
1/2 Cup of Pumpkin Spice flavored Candy melts
Additional Pumpkin Spice for garnish


In a food Processor, pulverize all of the donuts (may take several batches) until they are a fine crumb texture (like sand). Place in a large bowl. Add the rest of the ingredients and work into a soft dough. It should be a cookie dough texture that will hold a ball shape. With your cookie scoop, make balls of dough (I used a 1-inch scoop but if I did them again I would use a smaller scoop) and place them on a parchment-lined cookie sheet. Chill in a fridge for 3 hours or over night.

Melt the almond bark. Slowly dip each ball and shake off extra bark. Place each dipped ball on another parchment-lined cookie sheet. When all the balls have been dipped, melt the pumpkin spice flavored melts and drizzle over the white almond bark. Sprinkle with pumpkin pie spice. Keep in fridge until ready to eat or give away. Should last for 3 weeks in an air-tight container in the fridge.


Sunday, November 1, 2015

Baby Zen Sprinkle


Photo Courtesy of Rachelle Bendixon


Have you ever been to a Baby Sprinkle? They seem to be quite trendy now. It's a smaller scaled spin on a traditional baby shower, where a small group of friends and family can "sprinkle" the new mom with necessities.

I recently had the pleasure of co-hosting a sweet baby sprinkle for my friend and work partner Melissa Skorpil. She is due with her first sweet bundle of joy in November.

The idea behind this sprinkle was to allow the guests to eat, drink and craft in a relaxed environment. No crazy games like tasting baby food, keeping track of clothes pins, etc. Rachele B (our friend and photography assistant) was in charge of the crafts and gifts. She made little stations all over the living room where the guests could either paint, stitch or applique on onesies, create cute finger-tip art on mini canvasses, or decoupage letters onto a wall-hanging for the nursery.

I must say that this was by far the most relaxed baby sprinkle I have ever co-hosted or attended. Having four hostesses broke all of the jobs up, from invites to food to crafts. I highly recommend this when taking on any party. Jennifer B and Jennifer K (Melissa's long-time friends) were in charge of invites and all the "woodland animal" decorations that were sprinkled throughout the room. They also made probably (in my book) the cutest baby diaper bassinet ever (another spin on a diaper cake).

Of course, I volunteered to make the food. Yes, I was a bit nervous at first to create a menu for her, however, when I sat back and really thought about it, it made perfect sense that I was in charge of this task blessing honor. It's been two years now that I have been honored to work as Melissa's food stylist on photo shoots, and of course I know what she likes and how important attention to detail is with her. I also know that she is really good at letting me have creative freedom, so with that I created a simple yet nourishing menu for the day. As for the menu, I stayed with vegetarian and since Melissa likes sweets I spun it again from one traditional cake to several sweets to choose from. When it came to the favors, I wanted to do a spin on that as well. I found these huge pears and decided to put a seasonal spin on the caramel apple and make it into an edible favor. Wrapped up with little "zen" sayings was the perfect way to end on a sweet note of love for Baby Jack and his Mama to be.

*All photos taken by Rachele Bendixon unless otherwise stated.

The Buffet Table


Autumn Quinoa Salad with Orange Vinaigrette

3 C. Cooked cooled Quinoa
2 C. Diced Roasted Butternut Squash
1 Red Bell Pepper Diced
1 C. Thinly Sliced Sweet Peas
1/2 C. Thinly Sliced Red Onion
1 C. Goat Cheese Crumbles (Optional)
1 C. Pomegranate Seeds
4 C. Mixed Field Greens
Orange Slices for Garnish

Orange Vinaigrette 

1/2 C. Fresh Orange Juice
2 Tbsp Dijon Mustard
Salt & Pepper
1 Tbs. Honey
1/2 C. Olive Oil
Place all of the above in a mason jar, attach lid and shake vigorously until thick.

In a bowl, combine the quinoa, squash, bell pepper, peas and onion. Toss with 1/2 Cup of vinaigrette.
In a large salad bowl, lay mixed greens followed by the quinoa mixture. Sprinkle cheese and pom seeds over top. Serve remaining vinaigrette on the side. Garnish with orange slice.


Brussels & Apples Salad


In a bowl, combine the following

3 C. Thin Shaved Brussels Sprouts
2 Apples (thinly sliced)
1/2 C Blue Cheese Crumbles
1/2 C. Toasted Pecans

1/2 C.  Balsamic Dressing

Line a bowl with mixed field greens. Top the greens with the brussels salad. Garnish with Larger thin slices of apples. Serve the rest of the dressing on the side.

Caramel Dipped Pears with Melted Chocolate and Sea Salt. Photo By Kristina Wolter


Photo by: Kristina Wolter


Finished Favor


Cheese Stuffed Rolls and Pesto Palmiers

Using craft paper and fresh foliage from my yard, I was able to create an inexpensive "woodland animal" themed table.


Image courtesy of Melissa Skorpil

That adorable Diaper Bassinet

Our painted/appliqued onesies. Image By Melissa Skorpil


Thursday, September 3, 2015

School's in session.....


This past week, my youngest started her senior year of high school - What?????? When did she grow up? My husband says that our daughter and I are exactly alike - she's got a healthy dose of my stubborn side.  I say she is more like him as she is witty, sarcastic, sporty, and academically smart like him. She and I don't have much in common when it comes to school. My favorite classes were Foods 101, Home Economics and working in the cafeteria. Her favorites are Creative Writing, Lacrosse, and Orchestra. She even mentioned she enjoyed Physics once or twice - a class you could not pay me to understand or enjoy!  But the two of us do have one thing in common - we like to eat.  She's not much on the school cafeteria food, never thought it was worth the cost or the time waiting in line.  I, on the other hand. loved our cafeteria food.  Everything was scratch-made each morning. Nothing was brought in. I lived on pretty much the same thing for lunch every day. A hot ham and cheese pocket (remember, scratch-made), a chocolate milkshake and a peanut butter chew bar for dessert. Before you leave a comment about how unhealthy those choices are, remember, I was also a teenager.

I still remember the year I got to work in the cafeteria for extra school credits.  My job was to cut and bag those freshly baked peanut butter treats while they were still warm to ensure they stayed chewy. The only thing I could kick myself over is that I never got the recipe for them.

Thanks to the internet and Facebook reunion sites, I found out that I was not the only one in my school who loved those bars. One of the former students had gotten the recipe and posted  it.  Right off I noticed that some of the measurements were off (1/4 cup of Vanilla? I went with 1/4 Tsp.) so I made a couple of adjustments without ruining the integrity of the recipe.  After one bite, I was instantly transformed back to the halls of high school.

I'm not sure what memories will stand out the most for my daughter this year, but I'm fairly certain food, whether it be on campus or at home, will always give her good memories. I'm jus' sayin'!


Peanut Butter Chews adapted from the original cafeteria recipe of  John Muir Junior High School by a fellow alumni student Juaquina Thorpe Twidwell

.
PEANUT BUTTER CHEWS
1/2 c.   white sugar
1/2 c.   brown sugar
1/4 t.    salt
1/2 t.    baking powder
3/4 c.   rolled oats
1/2 c.   flour (sifted)
3 T.      butter
1          egg
1/4 c.   peanut butter
1/4 tsp.   vanilla

1.     Mix dry ingredients together.
2.     Cream in butter and eggs.
3.     Add peanut butter, flour and vanilla.
4.     Mix just enough to blend all ingredients (do not over-mix).
5.     Put mixture in a parchment lined square 8x8 cake pan.  Press down with fingers to make level.  Make sure mixture is well into corners.
6.     Bake 375° for about 13 minutes or until golden in color.
7.     Chews will be quite soft when removed from oven but will firm up as they cool.
8.     Sprinkle with powdered sugar.
9.     Cut while still warm into squares.


Saturday, July 25, 2015

Butter Mint Ice Cream


When I was a kid, I thought that if a restaurant had a dish of butter mints near the door on the way out, then it was a sign of fine dining. After dinner mints still come in a wide variety of styles and flavors. Party mints (those cute little pastel colored mints), fancy jelly mints, and the rare but equally delicious black anise mints. However, my favorite of all time has to be butter mints. I'm not sure if it was because of the name and that they looked like little pats of butter to me or that they had a tinge of salty butter flavor mixed with that melt-in-the-mouth mint flavor. Either way, they have always been a favorite of mine.

Once in a while, when I was quite young, I would go with my Mom to visit elderly relatives. You could always bet they would have a shiny cut glass candy dish sitting on a coffee table filled with something interesting. I would eye it with anticipation in hopes that they would notice and offer me whatever was in that dish. There were times when the mint was old and perhaps stale (based on how hard they were) but I would savor it in my mouth and let it melt slowly - which sometimes took the duration of the visit and kept me well behaved!

Now that I am all grown up, I still crave many of those flavors from my childhood. Butter mint being no exception to that rule. Here, I mixed cool, creamy ice cream with a light butter mint flavor followed with crushed party mints swirled around. A perfect way to take your "everyday" meal and turn it into a fine dining experience... I'm jus' sayin'!


Butter Mint Ice Cream

1 1/2 Cups of milk
1 1/8 Cup of sugar
3 Cups of heavy cream
1 1/2 TBSP of Butter extract
1 Tbsp Of Mint Extract
~ Crush in at the end of ice cream process 3/4 Cup of Crushed Party Mints or Butter Mints

Combine all until sugar is dissolved. Then follow manufacturer's directions for the ice cream maker.


Saturday, June 6, 2015

Spicy Mangodoodles


Part of my job is consistently keeping up with food trends. Of course, doing that covers a gamut of areas, one of which is "Packaged Foods". Because some of my work is styling for packages, I'm always browsing the shelves of the stores I visit to see the big brand names, as well as the small local products, are doing.

Though I'm usually a "bake from scratch" kind of gal, I like to pick up new flavors of mixes to try and see if I can tweak them a bit. I found this cookie mix the other day while scanning the shelves and was intrigued by the flavor - "Mango". Always a fan of the fresh mango, I thought I would give the mix a try. One of our favorite ways to eat fresh mango and pineapple here at home is to sprinkle the spicy taste of Trechas all over it. I also love "Snickerdoodles" so that pretty much sums up how I came up with this easy recipe. Give it a try, or if you find the mix and try something different, let me know in the comments below. I'm thinking of putting a scoop of mango sorbet in the middle of two of these cookies for a yummy summer ice cream sandwich. Sounds good, right?


Spicy Mangodoodles

1 Box of Pillsbury Mango Cookie Mix
1/2 Cup softened butter
1 Egg

Trechas Spicy Powder (Usually found in the produce section or Latin aisle of grocer)

Make Cookies per instructions on back by mixing the soft butter, egg and cookie mix until a soft dough forms. Roll in balls and then dip tops in Trechas powder. Bake at 350 for 7-8 minutes. The powder can burn quickly so keep an eye on your cookies depending on what size you make. I used 1 and 1/2 tsp of dough per cookie.


Tuesday, March 31, 2015

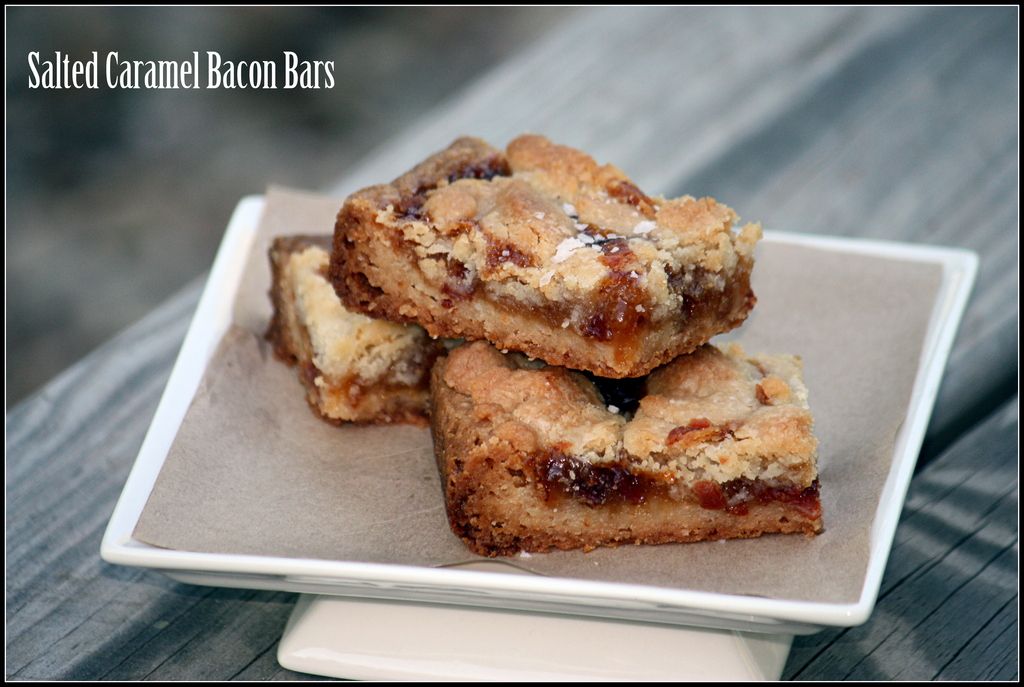
Salted Caramel Bacon Bars


There are some foods that just naturally go together, like PB&J, chips & salsa, and beer & pretzels, to name a few. There are also some that, well... let's just say they've been tried and experimented with and in the end, should have been left alone. I'm not judging, as I have eaten my fair-share of unpopular foods and enjoyed them. But when it comes to experimenting, the one food I find that always seems to end up on top when mixed with other foods - unless you are vegan - is bacon. I'm talking about that trusty, salty, crispy, fat-drenched pork candy!  Can I get an Amen!

Now, all of my vegan readers will just have to pardon me for a second as I share this newest creation. It's quite simple, actually. I have a friend who had a birthday over the weekend and let's just say she is pretty obsessed with that pig candy.  She is also a lover of salted caramel and I wanted to bake her something special for her special day. With both of those in mind, I decided to try combining the two flavors.  I must say that I have been making these caramel bars from Averie Cooks more than my fair share in the last few months as people just go nuts over them.  I also like how easy they are to make. Adding the bacon seemed like a no-brainer... as well as a match made in heaven... I'm jus' sayin'!


Salted Caramel Bacon Bars
  
Makes one 13" x 9" pan of bars (Depending on your love of bacon and caramel)

1 1/2 Cups of Unsalted Butter (3 sticks) Cubed in 1 Tbs. increments
1 1/4 Cup of Powdered Sugar
3/4 Cup Granulated Sugar
1 1/2 Tbs of Vanilla Extract
3 Cups of Flour

3/4 Cup of caramel sauce (store bought ice cream topping is what I used)
1/2 lbs of crispy cooked bacon chopped in bits. (I used low sodium bacon)
1 Tsp. of Kosher Flaked Salt

Pre-heat oven to 350˚.  I baked the bacon first using this method, but kept the oven temp at 350.
While the bacon is cooking, place the butter and sugars and vanilla in your mixer fitted with a paddle. Mix until all are incorporated. Then scrape down the sides and add your flour. Mix again until dough pulls away from the sides of the bowl. Line your 13x9 in pan with parchment paper (I always do this to make sure the bars don't stick and get really good cutting results). Take 3/4 of your dough and pat it in the pan making sure it is flat and even throughout the pan.

~ Note: I will place another piece of parchment on top of the dough and use a glass or small roller to make sure the dough is completely flat and even. Then I remove the top parchment.

Before placing in the oven, use a fork and prick the top of the shortbread all over to prevent bubbles. Place in preheated oven and bake for 20 min. After the first baking, pull out and spread on top (evenly) your caramel sauce. Then sprinkle on your bacon bits. Lastly, sprinkle on the kosher salt. Then take your left-over dough and crumble little bits (dime size) all over the top and place the whole pan back in the oven for approx 20-30 minutes until all the shortbread crumbs on top are brown and golden. Cool an hour (I know, it's hard to wait!) before taking the whole parchment-lined bar out of the pan and cut into squares.

~ Note: after the bars come out and before you cut, you can drizzle more caramel on top.  I prefer not to as they are easier to handle. You have now been warned. These bars will go quickly and they will become your new best friend, or share and get yourself a whole new group of best friends.

Happy Birthday Suzanna!


Tuesday, February 3, 2015

Food Styling - It's What I Do


Photo Courtesy of Skorpil Photography

I guess it's about time to post an update as to what I do now.  Last September, I attended the AFBA Photography Camp hosted by Kristin Sheppard. It was a wonderful 101 class packed with many wonderful nuggets of information. It was in this class that I met one of the speakers, Melissa Skorpil of Skorpil Photography. Her warm professional smile and honest approach to teaching the tricks of the trade begged me to ask her if she ever used interns on her photo shoots. She said "sure" and the next week I was off to a shoot to follow her around and assist wherever needed.  By the end of the shoot we quickly realized we worked well together. I'm not sure if it's her positive energy that first drew me in or her extremely professional ability to be precise in capturing what the client's requests are.  Either way, I was excited to tag along any chance I got. After our first shoot together I confessed to her that I really had no desire to do the actual photography and that my heart was really in styling food. Call it coincidence or good timing  (I call it a blessing) but she happened to be looking for a full time stylist.  I quickly delved back into all of my food styling books. Though I had been styling for years, there were a lot of tricks that I needed brushing up on. Melissa has been teaching me her tricks on every job we do and I teach her what I know. We work with an amazing assistant Rachel Bendixon, whose calm spirit adds so much to the zenergy on each set. The three of us have melded together quickly and our shoots have been so smooth that Melissa one day referred to us as her "dream team".

What is a typical day of shooting like? There is no "typical" day, which is why I love this job so much. Every client has different and specific needs. On some shoots, I am recreating "chef prepared" plates. On others, I have to bring in a full kitchen and spend hours the day before preparing food for the shoot. You might find me on the ground with a paint brush on one job or in a chair with an embossing tool melting strands of cheese on another. I often get asked what it is I do as a food stylist. When it comes to food, the question might be more like "what is it that I don't do with food?"  Another subject I get asked about more often then not is the actual photography.  I want to make it very clear that I am NOT the photographer. These are two entirely different jobs.

So what am I? I'm a food stylist! What do you do all day? I carefully and artfully arrange food, I make sure that the perception of aroma and taste get in every shot the photographer takes. I use creative freedom to express a story with food. And at the end of the day, if I've made my photographer happy - and ultimately the client happy - then I have found joy in what I do, There is something very comforting in knowing what career you were meant to do in life. So now, after running a bakery and a catering company, working on film sets, writing a blog, and doing recipe development for 30 plus years, I can finely say that I have found my own inner peace within the food industry. I'm jus' sayin'!


Recently, I worked on a shoot that required hours of preparation beforehand as well as a long shooting day. To help answer the question about what a food stylist does, I thought I would include a rough breakdown of what I did for this particular job, most of which is typical for any shoot, and even though this is an incredibly rewarding job, there is still quite a bit of work involved. 

All jobs require a pre-shoot meeting with the client and photographer, usually the week before the scheduled shoot date. These meetings generally consist of strategy building, a discussion of potential props to be used, and the shoot schedule. I always put aside a minimum of 2 hours for this meeting.

Shopping & Props: If I am preparing the food to be shot, I'll need to visit the grocery store. Another common stop is the fabric store if small back-drops are necessary. Depending on the job, I may also need to visit specialty food stores, along with whatever stores may have the specific props being used in the shoot.  Luckily, I have a pretty large inventory of props and rarely have I had to go and buy new items. Time allocation for this will vary based on the scope of the shoot.

Prep: All food that needs to be cooked beforehand, needs to be done the night before. Most studios do not have usable kitchens, so I have to figure out what can be pre-cooked that will still look fresh on the set. For instance, for this particular shoot I needed scrambled eggs. I brought my single burner hot-plate and skillet to the shoot so that I could make them fresh. However, I made the chili the night before. I also prepped all my garnishes and "add-ins" for the chili the night before. This advanced preparation took about two hours.

Scrambled eggs made fresh on set.

Craft Services: Our shoots often go on for a full day and we are generally not able to simply leave for lunch. For this particular shoot, we were starting early enough that breakfast was also required. I placed orders for coffee and breakfast tacos so that I could pick them up on the way to the studio in the morning, and then later called in lunch orders for the crew. I also packed an extra plate of snacks that I put out for the clients while they waited in between shots.  Always make sure you ask in the pre-shoot meeting if any of the people going to the shoot have any dietary needs - nothing's worse then turning a vegan client off with a turkey sandwich for lunch. Time spent ordering, picking up, and putting out the food was about 30 minutes.

Prep My Styling Kit: In preparing for a shoot, I go over the shot list the night before and pack all the tools (utensils, cutting boards, etc.) that will be used, as well as any extra tools I think I might need, into my "kit". My kit is simply my toolbox - it contains everything I might need on the set.  I also double check that all my props are packed and triple check that I have plenty of garbage bags, paper towels, and make-up sponges as I always seem to go through plenty of these on every set.  I generally like to pack as much as I can in my car the night before. Doing so makes it easier to get going in the morning and helps keep everything organized. This prepping and packing usually takes about an hour.

Morning of shoot: Pull all of the refrigerated items out and get them in an ice chest. Once again, review the shot list - I do this because it's so easy to forget something. Get showered and dressed - wear black so you don't reflect light while the photographer is shooting.  Pick up the coffee and tacos pre-ordered from the day before. Get to the set and prepare to start schlepping. Depending on where the shoot is, parking may be an issue.  Remember that the further away the car is parked, the farther everything in the car must be carried. After all of the boxes, props, and kits are inside, I start setting up my make-shift work station. This usually takes 30-45 minutes.
Tray of Stand Ins and Heroes

Once my prep station is set up, the real fun begins.  I start by getting the first "stand in" ready for lighting. I then go back and work on the "hero". Once the hero is ready, it goes to the set to replace the stand in. I make sure to have a tray nearby with tools like tweezers, paint brushes, and eye-droppers in case the photographer needs anything adjusted or tweaked. I count on spending at least an hour per plate, from initial styling to shooting the finished photos. Throughout this process, I am constantly working with the photographer to get every detail managed. I try to never get frustrated by what the photographer needs me to do. As stylists, we don't always see things through the lens like they do. It's easy to sometimes take things personally in this job. It's very important to understand that though we are generally very good at your craft, so is the photographer, and ultimately it is their  finished work that goes to the client. If the photographer does not like how something looks or if they feel that the food needs to be manipulated, and then manipulated again, don't get frustrated. That's our job.  It's what we were brought in to do.  We keep doing it until it's perfect! If you have the privilege of working with the same photographer over multiple shoots, as I have, you will likely get to know their style and it will be easier to understand their vision with each new shoot. As with most everything, communication is key here. If the stylist and photographer are bumping heads on a set and showing any frustration then it will surly be revealed to the client and ultimately, I believe, in the finished photo. If there's a problem manipulating the food to do what is being asked then take a second and re-group. It's better to take a few minutes then to get frustrated and give up. There is always a way to make things happen. Staying calm is a key to this job!

Photo Courtesy of Skorpil Photography

As soon as that first shot is finished, there's just enough time to start on the next plate while the photographer (or the assistant) is changing the lighting. This is where the zenergy must kick into overdrive.
Melissa shoots "tethered" so the client can approve each shot as we go along. Having an assistant like Rachel who knows her way around a camera, computer and a studio is essential to a strong team.

After several plate changes, it's time to eat lunch. Make it quick, but take time to talk with the client.  I find that the more I get to know them the better I am at getting their vision across in the styled dish.
Then it's back on the set for the second half of the day. Prepare to stand more then you sit. Prepare to be up and down on your knees as some shots are close to the floor. Stay hydrated - it's easy to forget when in the work zone.

Tweezers and paint brushes become your "go to" tools of choice for small details.

There are a few additional things that I try to adhere to when on a shot. Keep it light but professional! In the attitude, the music, and the work. Being flexible goes a long way. Never forget that clients are in the room, so don't start chatting about any personal problems around them. Remember the first client is the photographer, try and understand exactly what their vision is for each dish.  If the photographer says they see a small hair or imperfection, trust them, they want to give the client a perfect shot, not give you a hard time.

When it's time to clean up, I like to go by the Girl Scout rule "Leave the site cleaner then you found it." If I made a mess I clean it. I take all garbage out of the facility.  Essentially I want the client or studio we rented to never know we were there by the time we leave.

For me personally, I always take a deep breath when I've loaded up my car and say a little prayer of thanks for another wonderful day of  learning working. A day of being blessed to be on such a wonderful team. And thankful for the clients that are so unique and fun to work with. On my way home, I think about how the day went and if I would have done anything different.  I also dream about someone else making dinner...
What you don't see is cubes of styrofoam under the chili and tomatoes and pintos placed specifically in the chili. each Strand of cheese is hand placed with tweezers.
Finished photo courtesy of Skorpil Photography
To see more beautiful pictures of food that I have styled, follow Skorpil Photography.
Interested in taking beautiful pictures like these? Or want to know more tricks of the trade? Then I suggest taking Food Photography classes at Precision Camera here in Austin. Melissa will teach you some of those tricks of the trade and you will have the opportunity to put what you learn to immediate use when you take your own photos from 6 different photo bays that I style in the class. To see more updates on photos by Melissa follow her on facebook at Skorpil Photography. And if y'all want to keep up with my adventures in styling, you can follow my girlgonegrits facebook page.